iOS Custom Presentation & Transition (2) 〜UIPresentationControllerでカスタムモーダルを作る〜
UIPresentationControllerの役割
presentation controllerオブジェクトは、presented view controllerを管理する役割を持ってる。そして、presented view controller表示されてるときのスタイルを指定するなど。
ドキュメントに書いたやること
Set the size of the presented view controller.
Add custom views to change the visual appearance of the presented content.
Supply transition animations for any of its custom views.
Adapt the visual appearance of the presentation when changes occur in the app’s environment.
翻訳すると
- presented view controllerのサイズを設定
- 表示するときほかにカスタムビューが必要だったら追加
- transitionが行われるときに、そのカスタムビューに必要なアニメーションを追加
- アプリの環境が変わるとき、その変化に応じてpresentationを調整
これでわかること
前回で書いた通り、今回は半モーダルでdetailsViewControllerを出すのを作ってみる。
前回のリンク:
iOS Custom Presentation & Transition (1) 〜コード一行もない編〜 - your3i’s blog
それを作るとき:
- detailsViewControllerの表示するサイズはpresentation controllerが決める
- detailsViewControllerの後ろのdimming viewはpresentation controllerが追加する
- 遷移するときのそのdimming viewのアニメーションもpresentation controllerが追加する
- dimming viewのタップイベントもpresentation controllerが追加する
- 端末の回転とか起きたとき、dimming viewとpresented viewのサイズなどはpresentation controllerが調整
(自分は、presentation controllerを使わず、presented view controllerで全部やってて、変な実装をしたことがある😂)
カスタムUIPresentationController
カスタムUIPresentationControllerの適用
まず、空でもいいから、UIPresentationControllerを継承したCustomPresentationControllerを作る。
import UIKit

class CustomPresentationController: UIPresentationController {

    override init(presentedViewController: UIViewController, presenting presentingViewController: UIViewController?) {
        super.init(presentedViewController: presentedViewController, presenting: presentingViewController)
    }
}
そして、カスタムUIPresentationController使われるように、detailsViewControllerのmodalPresentationStyleを.customに設定し、CustomPresentationControllerオブジェクトをdetailsViewControllerに渡すUIViewControllerTransitioningDelegateのオブジェクトも設定する。
今回はdetailsViewController自分でUIViewControllerTransitioningDelegateにするようにする。
class DetailsViewController: UIViewController, UIViewControllerTransitioningDelegate {

    ...

    static func viewController() -> DetailsViewController {
        let storyboard = UIStoryboard(name: "Main", bundle: nil)
        let viewController = storyboard.instantiateViewController(withIdentifier: "DetailsViewController") as! DetailsViewController
        viewController.modalPresentationStyle = .custom
        viewController.transitioningDelegate = viewController
        return viewController
    }

    ...

    // MARK: - UIViewControllerTransitioningDelegate

    func presentationController(forPresented presented: UIViewController, presenting: UIViewController?, source: UIViewController) -> UIPresentationController? {
        return CustomPresentationController(presentedViewController: presented, presenting: presenting)
    }
}
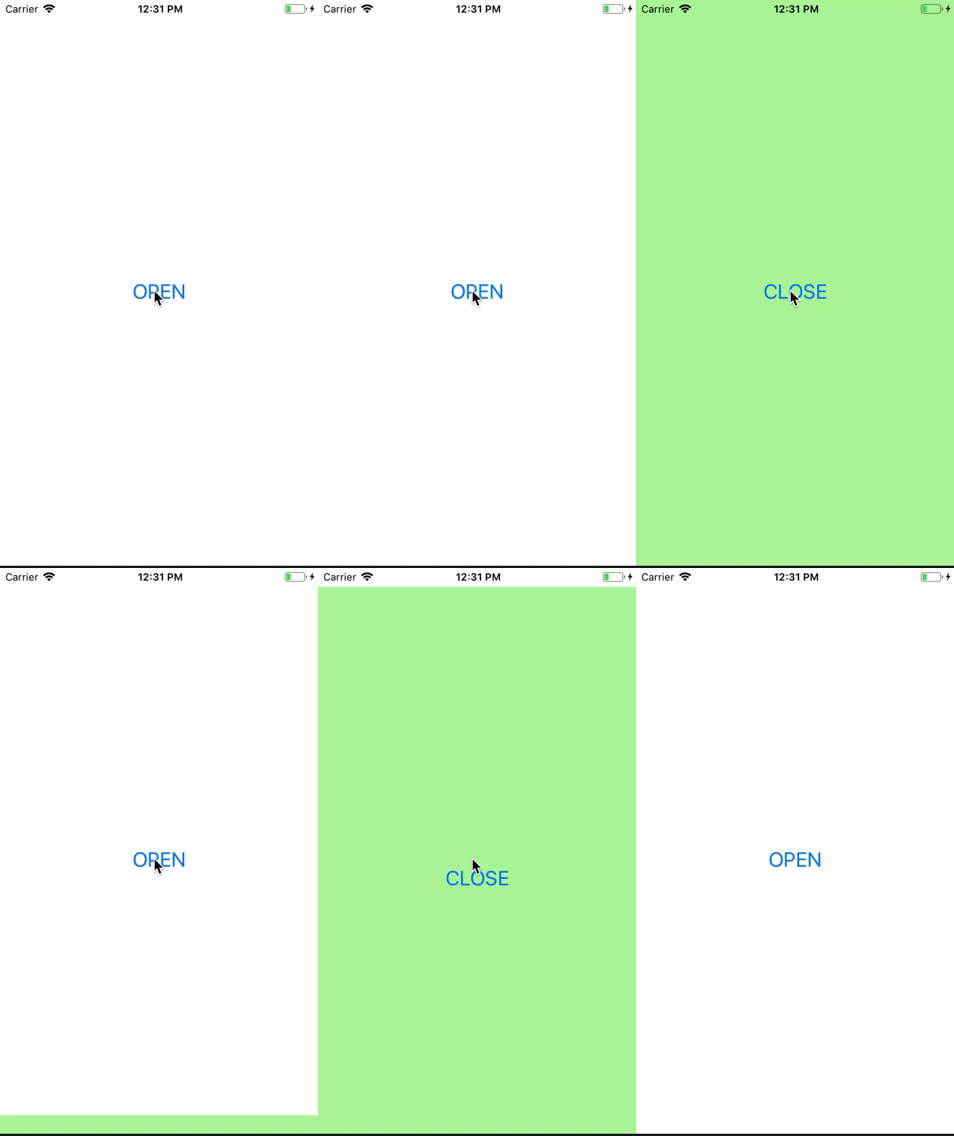
効果をみてみよう:
今はただ空で継承したから、挙動の変化はまだない。

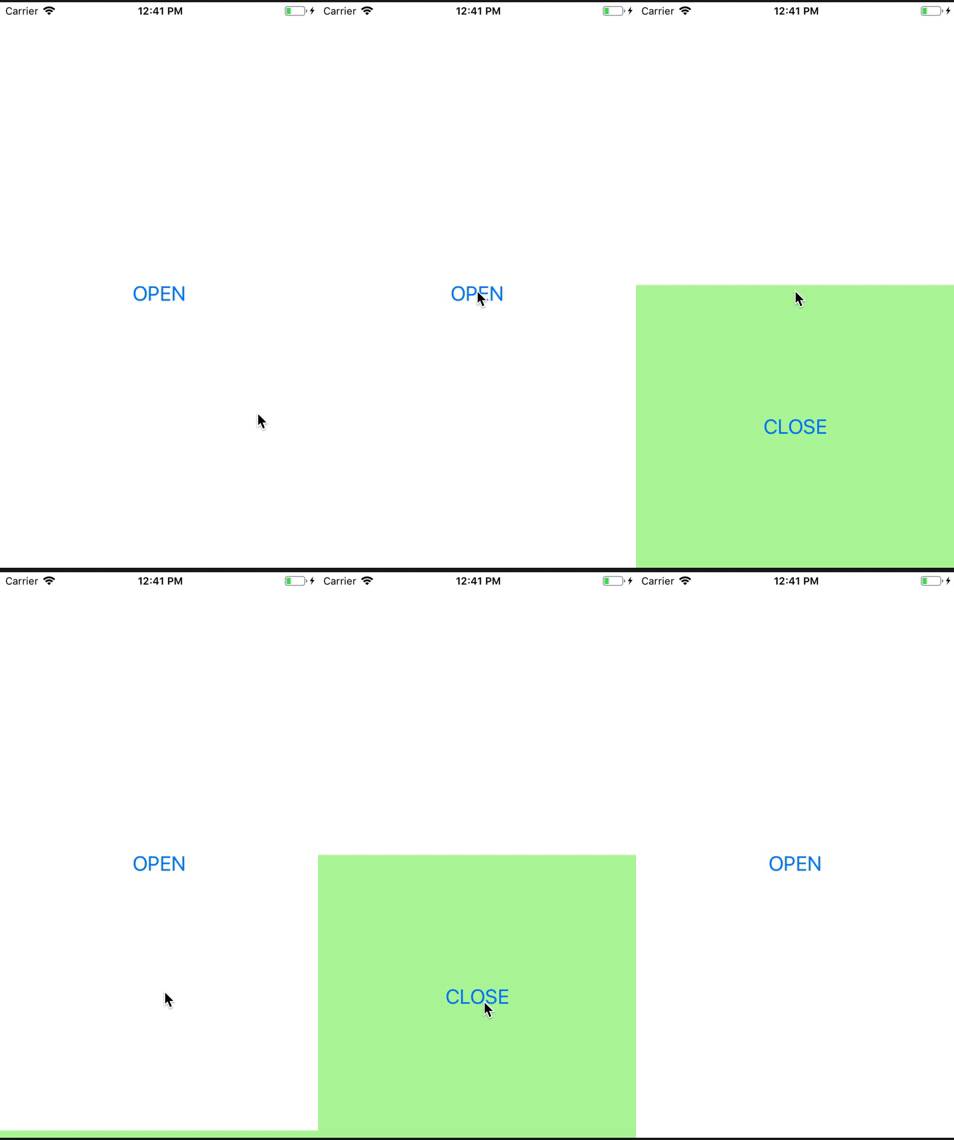
半画面にする
CustomPresentationControllerのframeOfPresentedViewInContainerViewをoverride。
containerViewは名前通り、presentationはこのビューの中で行われる。
override var frameOfPresentedViewInContainerView: CGRect {
    guard let containerView = containerView else {
        return .zero
    }

    let rect = CGRect(x: 0, y: containerView.bounds.height / 2.0, width: containerView.bounds.width, height: containerView.bounds.height / 2.0)
    return rect
}
効果をみてみよう:

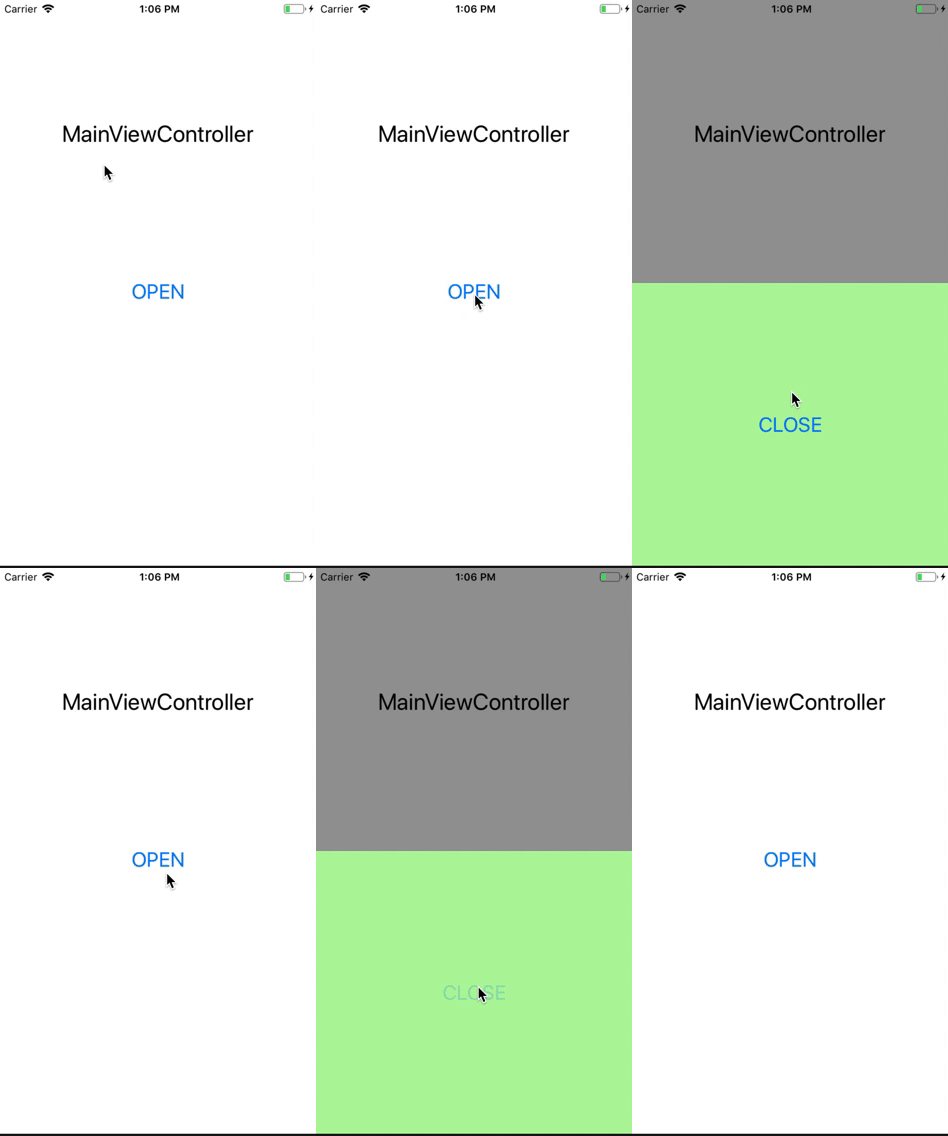
DimmingViewを追加
このステップで、画面の残りの部分をoverlayするdimming viewを追加する。
まずdimming viewを作る。
class CustomPresentationController: UIPresentationController {

    private var dimmingView: UIView!

    override init(presentedViewController: UIViewController, presenting presentingViewController: UIViewController?) {
        super.init(presentedViewController: presentedViewController, presenting: presentingViewController)
        setupDimmingView()
    }

    private func setupDimmingView() {
        let view = UIView()
        view.backgroundColor = UIColor.black.withAlphaComponent(0.4)   //透明度を指定
        dimmingView = view
    }

    ...
}
presentation transition開始するときにdimming viewをsubviewとして追加。
    override func presentationTransitionWillBegin() {
        guard let containerView = containerView else {
            return
        }

        dimmingView.frame = containerView.bounds
        containerView.addSubview(dimmingView)
    }

    override func presentationTransitionDidEnd(_ completed: Bool) {
        // もしpresentation transition失敗した場合、detailsViewControllerを出せなかったから、dimming viewもremoveする
        if !completed {
            dimmingView.removeFromSuperview()
        }
    }
detailsViewControllerがdismissされたら、dismiss transitionが行われる。dismiss transition成功に終わったら、dimming viewもremoveする
    override func dismissalTransitionDidEnd(_ completed: Bool) {
        if completed {
            dimmingView.removeFromSuperview()
        }
    }
効果をみてみよう:

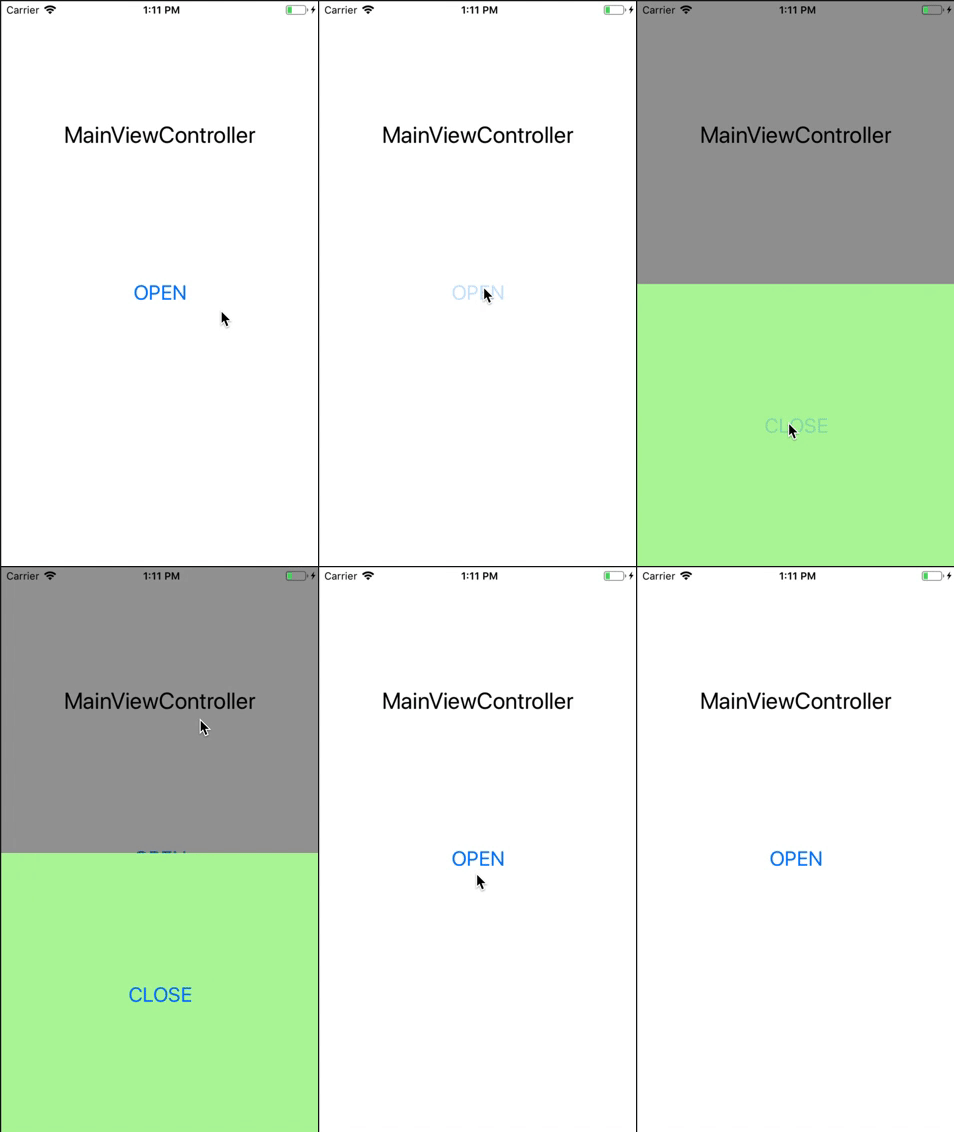
DimmingViewにアニメーションをつける
前のステップで、dimmingViewが追加れたかけど、出し方がちょっと微妙だね。このステップで、DimmingViewにアニメーションをつける。
表示するとき:
presentationTransitionWillBeginにアニメーションコードの追加。
    override func presentationTransitionWillBegin() {
        guard let containerView = containerView else {
            return
        }

        dimmingView.frame = containerView.bounds
        containerView.addSubview(dimmingView)

        // アニメーション→表示
        dimmingView.alpha = 0.0
        if let coordinator = presentedViewController.transitionCoordinator {
            coordinator.animate(
                alongsideTransition: { [weak self] _ in
                    self?.dimmingView.alpha = 1.0
                }, completion: nil)
        } else {
            dimmingView.alpha = 1.0
        }
    }
非表示するとき:
dismissalTransitionWillBeginを新しくoverrideして、そこに非表示のアニメーションを追加。
    override func dismissalTransitionWillBegin() {
        // アニメーション → 非表示
        if let coordinator = presentedViewController.transitionCoordinator {
            coordinator.animate(
                alongsideTransition: { [weak self] _ in
                    self?.dimmingView.alpha = 0.0
                }, completion: nil)
        } else {
            dimmingView.alpha = 0.0
        }
    }
効果をみてみよう:

タップしてdetailsViewControllerを閉じる
これは!もう簡単〜dimming viewにtap gesture recognizerを追加すればいい。
    private func setupDimmingView() {
        let view = UIView()
        view.backgroundColor = UIColor.black.withAlphaComponent(0.4)
        dimmingView = view

        // tap gesture recognizer を追加
        let tapGesture = UITapGestureRecognizer(target: self, action: #selector(handleTap(_:)))
        dimmingView.addGestureRecognizer(tapGesture)
    }

    @objc func handleTap(_ recognizer: UITapGestureRecognizer) {
        presentedViewController.dismiss(animated: true, completion: nil)
    }
完成!!!

まとめ
UIPresentationControllerを使ってカスタムモーダルを作ってみた。ほかのかっこいいpresentation styleも色々できそうな気がしてきた。
次回はカスタムtransitionを書く。
記事のまとめ
iOS Custom Presentation & Transition (1) 〜コード一行もない編〜 - your3i’s blog
iOS Custom Presentation & Transition (2) 〜UIPresentationControllerでカスタムモーダルを作る〜 - your3i’s blog
iOS Custom Presentation & Transition (3) 〜Custom Transition〜 - your3i’s blog
iOS Custom Presentation & Transition (4) 〜Interactive Transition〜 - your3i’s blog